Art Supply of the Week - Reds

What's on my Palette?
Reds can be some of the trickiest colors in an oil painter's palette due to issues of lightfastness in this hue range.

M. Graham Quinacridone Rose, Williamsburg Cadmium Red Deep, Vasari Terra Rosa, Michael Harding Cadmium Red and Cadmium Red Light

Earth colors are absolutely lightfast and whenever I need a medium chroma red I start with Terra Rosa. This particular red from Vasari tints with white beautifully to make perfect pink skin tones. Unlike red lake pigments, the terra rosa maintains lightfastness when mixed with white. If I need a touch more chroma, or saturation, I add some cadmium red. If I need a red that is a little more towards violet-red, such as the lips, I add in some cadmium red deep.

Other reds on my palette include quinacridone rose (PV19) from M. Graham as well as cadmium red light from Michael Harding.  I find these two highly saturated colors invaluable for painting brightly colored flowers. All pigments listed here have excellent lightfastness properties and provide me with a full selection of reds to pick from to capture any subject in this hue range. 

I do not tend to do a lot of glazing so you won't find any lake pigments on my palette. Lake pigments, like madder lake (alizarin crimson) are lightfast if used in a single pigment glaze with no added white. Vermeer's work is a great example of the proper use of an otherwise fugitive pigment cochineal scarlet lake.

Source: http://www.bethsistrunk.com/blog/

Art Supply of the Week - My Favorite Medium

Sun Thickened Walnut Oil - My Favorite Medium

My absolute favorite medium for oil painting is Sun Thickened Walnut Oil from Natural Pigments. 

brushes, walnut oil in a bottle and glass jar, cosmetic sponge in a dish.

Why it's my favorite...

I like this medium because it doesn't thin out my paint and make a slippery mess of the painting surface like regular walnut or linseed oil does. I like the paint in the consistency it is when it comes straight from the tube. Furthermore, this medium does not alter the drying time significantly or cause excessive yellowing. Natural Pigments also makes a linseed oil version of this oil but I prefer the walnut as it gives me more time to work the paint before it tacks up. 

How to use the Sun Thickened Walnut Oil

First, it is really important to adhere to the fat over lean rule and also use the medium sparingly. I mean really sparingly. (Unless you are painting enormous paintings one bottle should last for years.) In my first layer I never add any oil to my paint. After I have completed the first pass of the painting, there are some areas which require a second layer of paint to achieve the desired finish. Before I begin the second pass, I place a couple of drops of the oil into the pretty blue dish and dab the makeup sponge lightly into the oil. Then, using the sponge, I apply the oil to only the section in which I will be working for the day.  You want a nice even and very thin coat of oil that brings all the colors and any sinking in back to life. Next, I remove all the excess oil from that section of the painting with a clean sponge and commence painting.

Important Considerations:

It is important that your painting be fully dry to the touch and to apply the oil only to where you will be working that day. If you do not paint over the oil during that session you will have a section of the painting that is covered with a layer of 100% oil and that is trouble!

I add the oil to the second layer of the painting in this manner instead of mixing it into the paint on my palette to ensure that the layer of paint will receive an even quantity of oil throughout, facilitating a more even sheen across the painting's surface. Also, this method enables me to add less oil to the paint than I would if I were mixing it into each individual color. The less oil you add, the lower the likelihood an issue with the layer will develop and the less yellowing your painting will experience as it ages.

Glazing: This medium, due to its consistency, is not ideal for glazing applications. For that I add in a drop or two of Natural Pigments regular walnut oil to the sun thickened version until I have a consistency that I like for glazing.

Studio Tip: At the rate of using a few drops every couple of days, I estimate that it will take me several years to go through one bottle. By that time the excess air in the bottle will cause the oil to polymerize fully and be unusable. To minimize the quantity of air in the jar I add clean marbles to displace the air so this process will occur more slowly.

Source: http://www.bethsistrunk.com/blog/

Art Supply of the Week

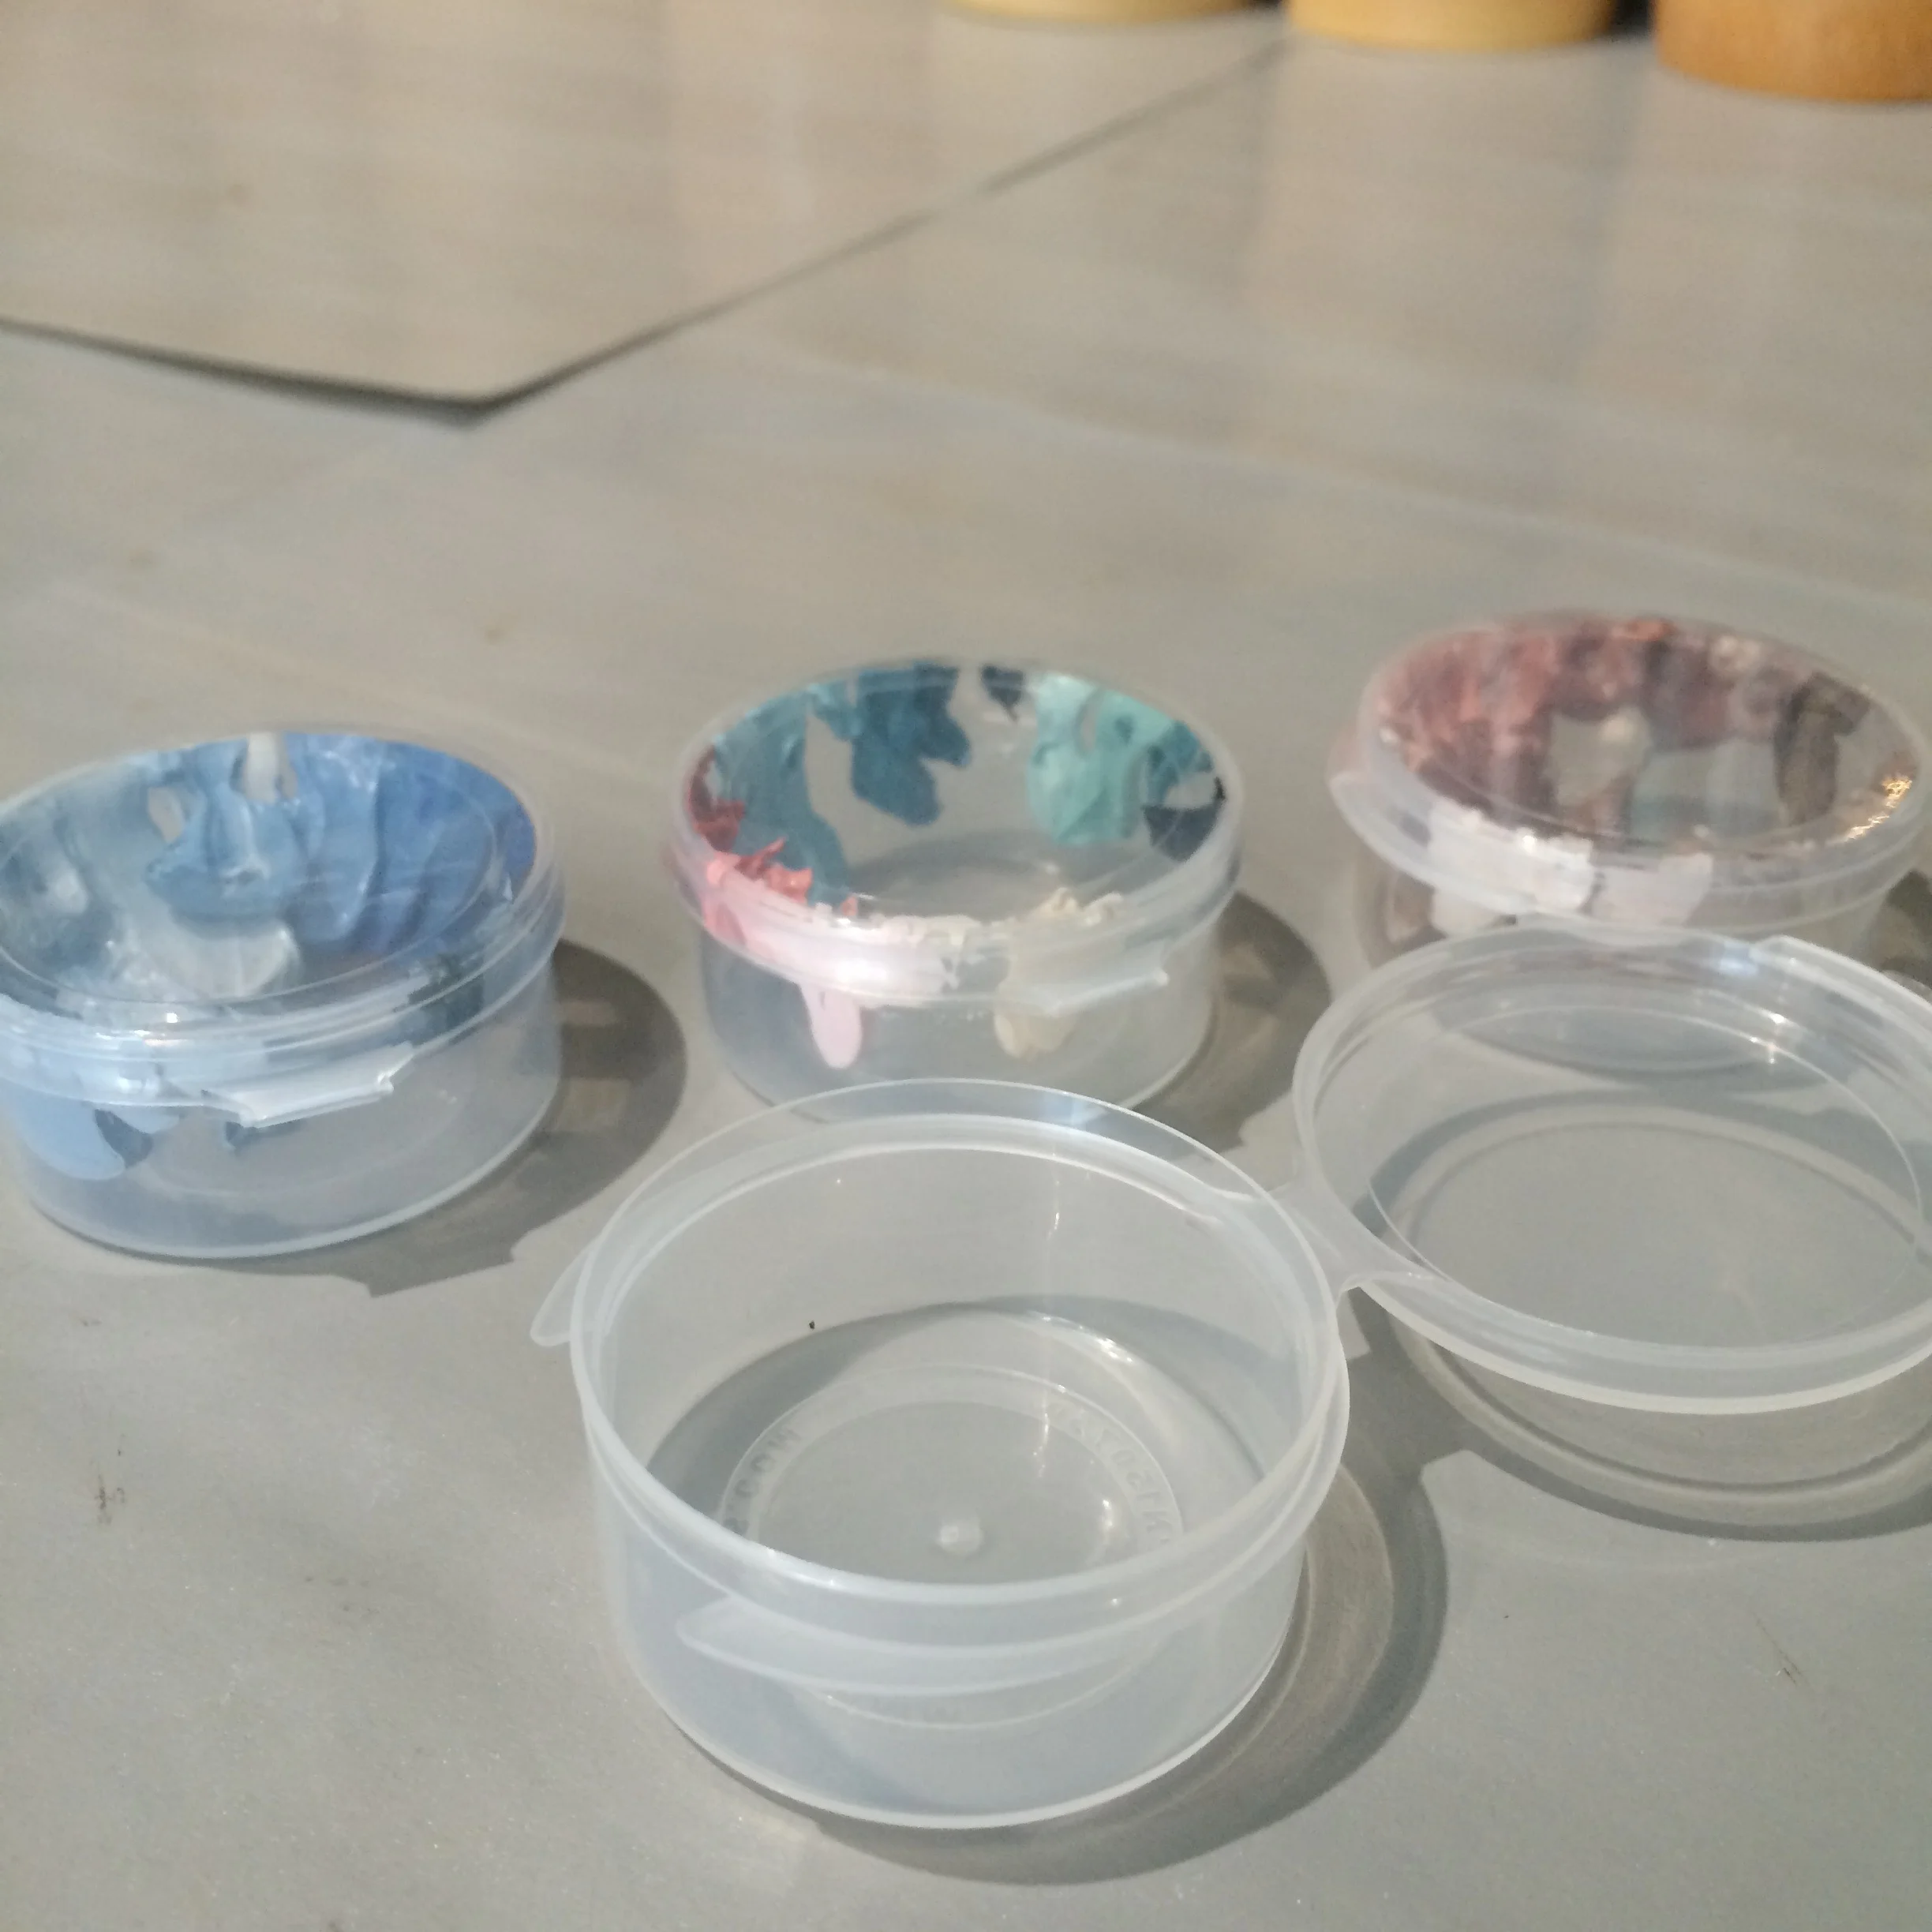
Plastic Palette Cups make saving a bit of paint a snap to match my colors to perfectly the next day.

Plastic Palette Cups from Blick - Left: Paint colors for "Preoccupation," Middle: "Time Lapse" and Right: "Duality."

Plastic Palette Cups from Blick - Left: Paint colors for "Preoccupation," Middle: "Time Lapse" and Right: "Duality."

You may have noticed from following me on instagram or Facebook that I work in sections. I try to finish each section in a day but sometimes this is not possible with an intricately detailed dress that appears on 3 different panels or a large sky. So in order to match my colors perfectly the next day I save a bit of paint from the current session. Saving the paint and using it to compare to while mixing new paint ensures that I have consistent color from panel to panel. (On a side note: unless you fill the container all the way the paint will continue to dry, but remains moist on the inside for months. That is ok.) Just pierce the skin with a palette knife and place some on your palette to mix your fresh paint to match. It's easier to perfectly match the hue, value and chroma of wet paint vs looking at my painting and trying to color match to dry paint. Matching the colors perfectly ensures that I don't have to go back and waste time repainting sections due to inconsistent colors on the different panels.

Why not just save the paint from my current session? First, the paint, being exposed to the air all day has already began the process of oxidation. If I use it the next day the consistency is very far from optimal if not unusable due to this oxidation and I would have to add additional oil to return it to a consistency that will yield good results. That extra oil could cause additional yellowing,  and would be inconsistent in sheen to what was painted previously. Not to mention I would have to try to remember what sections had extra oil added to them and which ones didn't so that I could adhere to the fat over lean rule. Ugh. But, most importantly it will not form as strong of a bond to the previous layer or ground because some of the cross linking that gives a paint film strength has already occurred due to this oxidation. So, I use fresh paint every day.

(Blick doesn't seem to offer this smaller size anymore but they have a 1 oz version that is slightly larger and will serve the same purpose.)

Source: http://www.bethsistrunk.com/blog/

Art Supply of the Week - Brushes for Hair, Skin and Soft Fabrics

Brushes... part 1 of ???

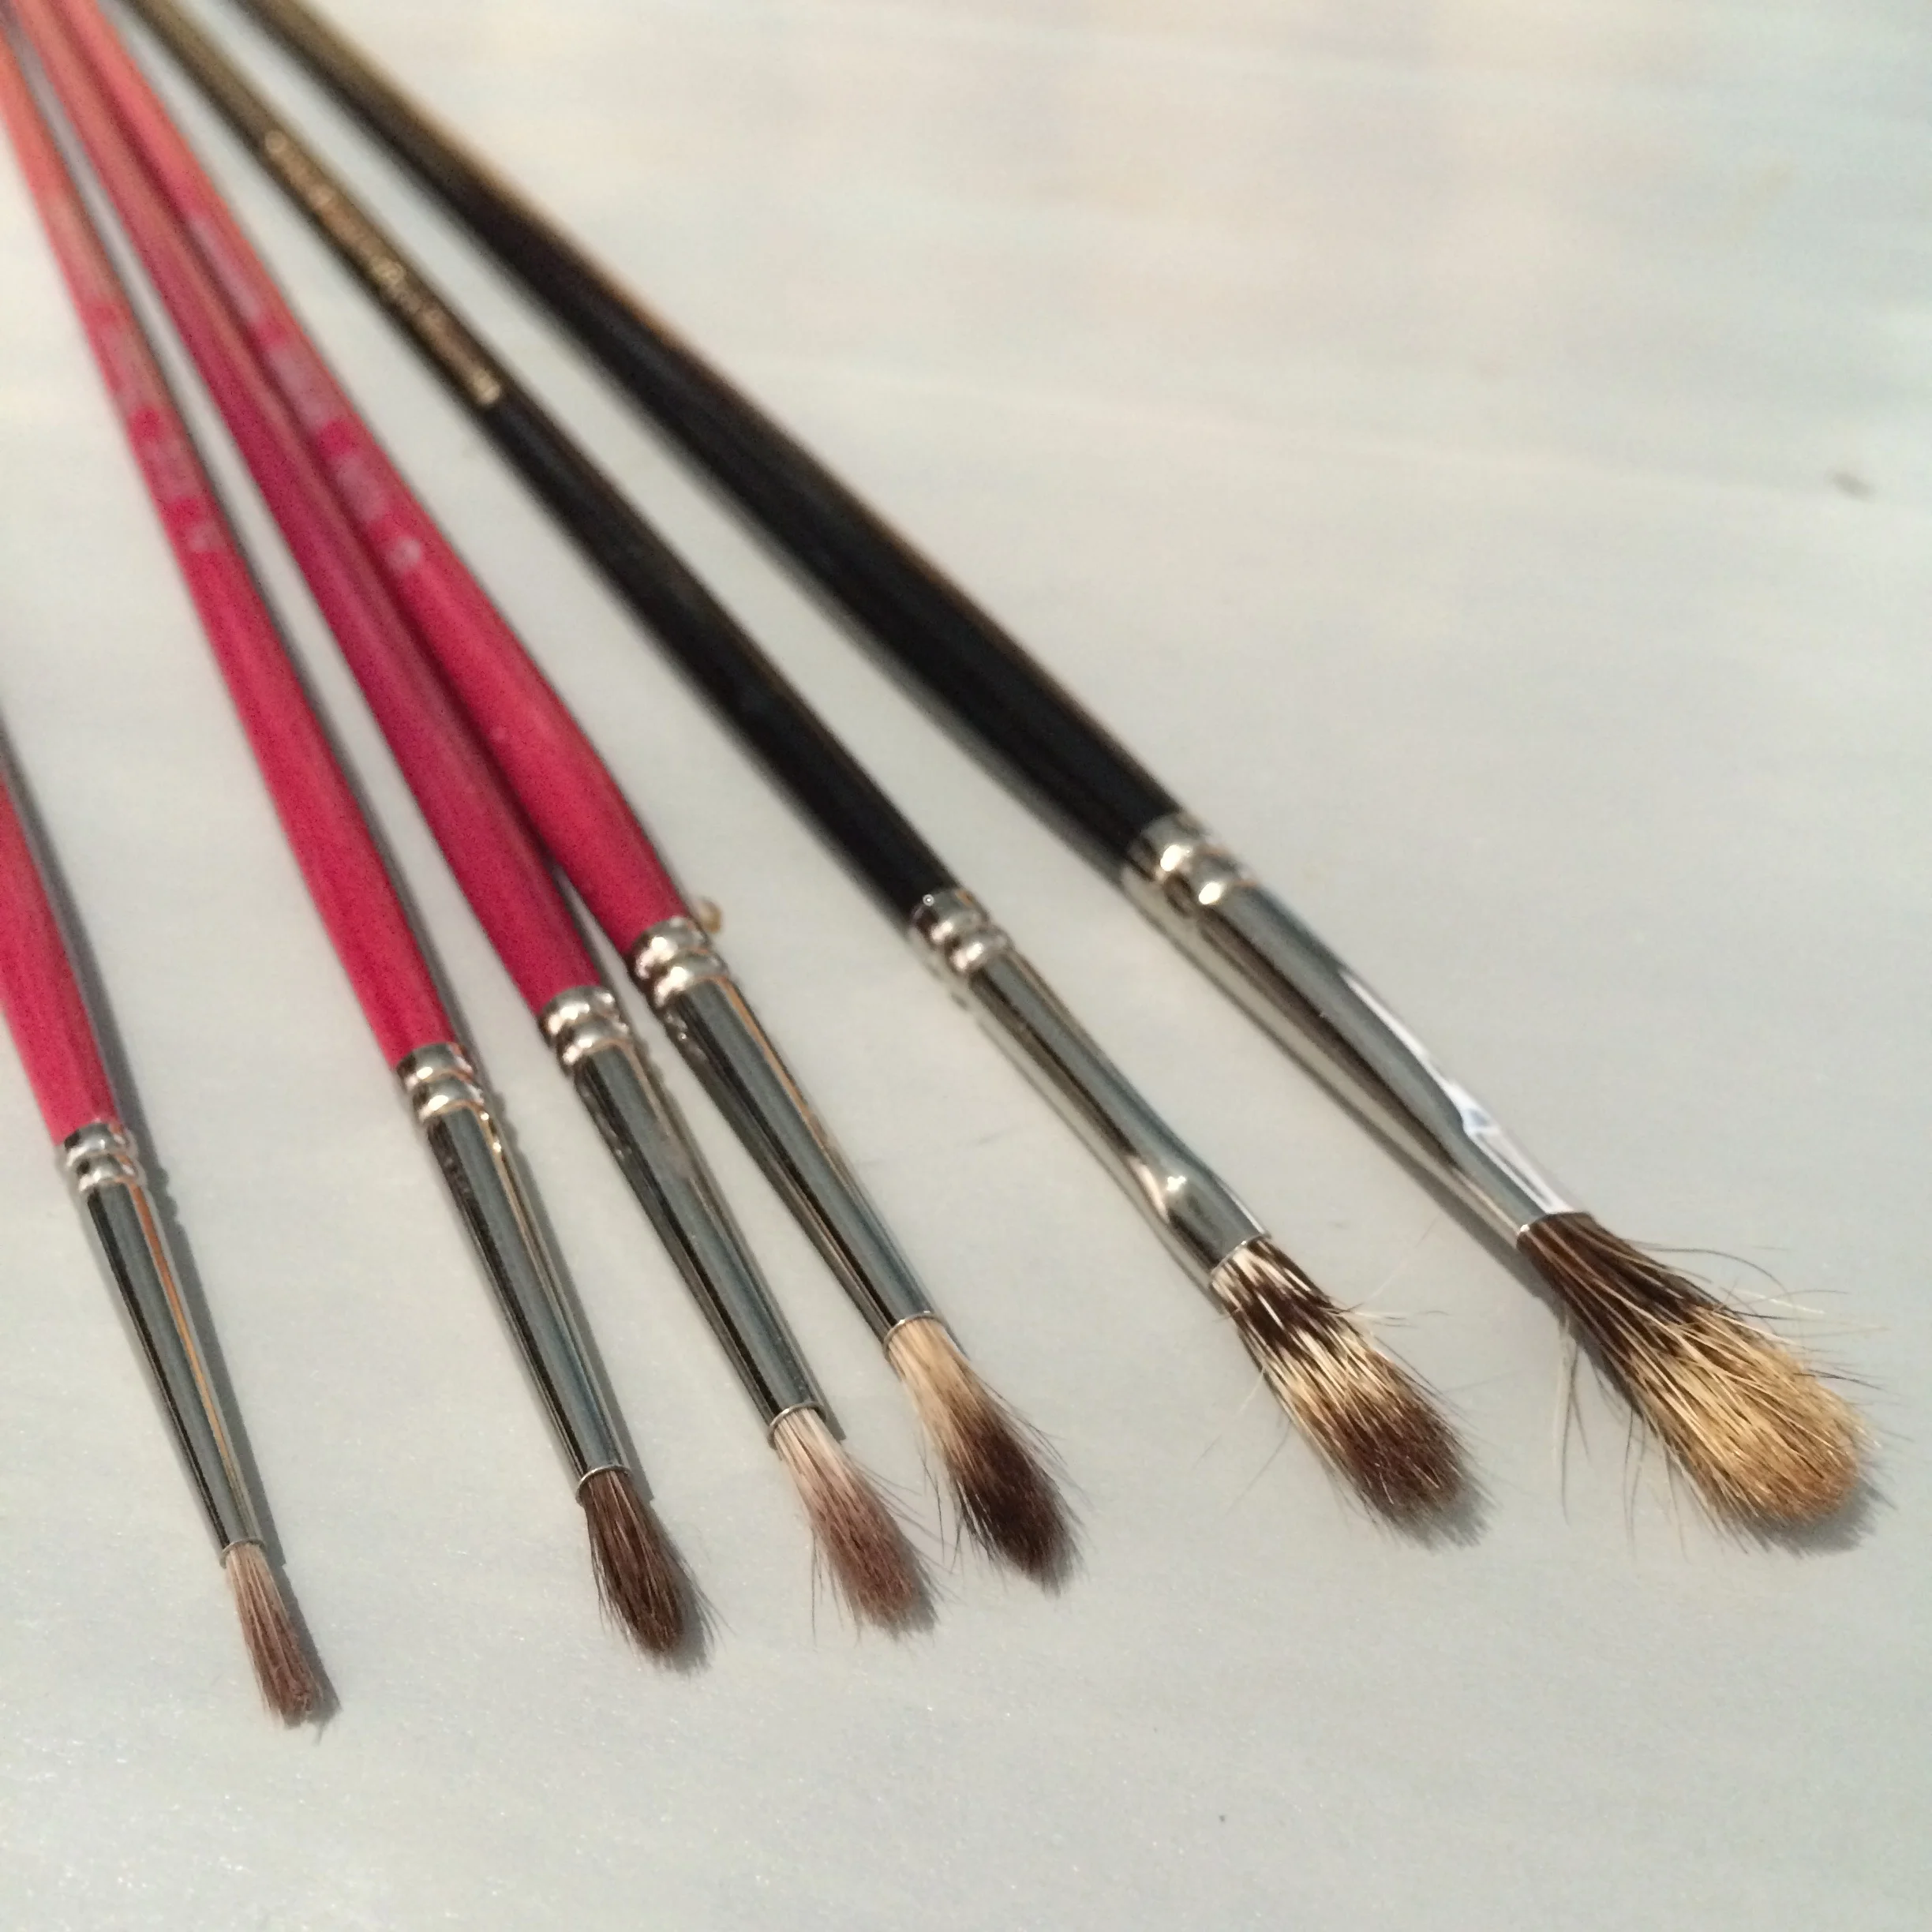
Left 4: Vermeer Classic Mongoose Rounds (Jerry's Artarama) size 2-8; Right 2: Rosemary & Co Master's Choice Long Filberts Series 278 Various Sizes

Left 4: Vermeer Classic Mongoose Rounds (Jerry's Artarama) size 2-8; Right 2: Rosemary & Co Master's Choice Long Filberts Series 278 Various Sizes

I use a lot of different brushes for the different things that I paint. I find that the shape, type of hair and softness of the brush are important to achieving the desired effect.

The brushes above are ones that I use in painting flesh tones, hair and soft fabrics like silk or chiffon. They are very soft, inexact and perfect for achieving variety of color in skin and hair. The Vermeer are my workhorses as I use them primarily to render the three dimensional forms of the figure when it is smaller than life-size, as well as hair and eyebrows. The rosemary brushes I use while carefully placing broken highlights on the skin after I have rendered the three dimensional shape. (When I paint a life-sized figure I switch to primarily using the Rosemary Brushes as they are larger and seem to hold up better than the Vermeer for working in larger areas.)

Source: www.bethsistrunk.com/blog

Art Supply of the Week - Modified Brushes

Modified brushes can come in really handy!

Top left: Dynasty Black Gold, Middle: Princeton Mop, Bottom Right: Robert Simmons Expression

Sometimes I want to soften a tiny little edge, like the chin where it connects with the neck, but I still need the line to stay really accurate. When I do, I use the blue-green and gold modified brush on the bottom.

The one in the middle isn't modified but I use it to more aggressively soften edges or make cloud edges a little more whispy. It's there for a comparison. The black and tan one on the top is an example of a brush whose bristles have been cut down a bit too far and is not as effective at blending - this is to be avoided. You want a nice dome shape with a little more length on the bristles such as the blue-green brush on the bottom right.

To make a modified brush I use embroidery scissors to carefully trim the bristles, of a brush that I had retired from use, into an even dome shape. I then carefully rub it on 400 grit sandpaper to soften the all edges of the freshly cut bristles and to also even out the shape. This is an important step, as without the sanding the bristles are quite stiff and it's like trying to soften an edge with nails. Ew! This modification works best when you use a brush that is soft to begin with like a synthetic sable. I like the Robert Simmons Expression Filbert brushes the best for this purpose. 

To use the modified brush you need to have plenty of paint on both sides of an edge. Lightly dab, being sure to involve paint from both sides of the edge, being careful to maintain accurate drawing. Be sure to keep the brush clean. If too much paint has been removed in the process just add a little more and carefully work it a bit with the modified brushes. 

Source: http://www.bethsistrunk.com/blog/